
Timber is an attractive but not particularly long-lived driveway edging material. Although we’ve already touched on it in our sections on choosing the right edging for Concrete and Tarmac driveways, it’s perhaps more common to find it with loose materials like Gravel, shingle and chippings. Wood is not really strong enough for block and brick paved driveways, though, as timber is more likely to move or warp under sideways forces.
Table of Contents
Current Uses of Timber Edging
Its current popularity is largely down to timber edging being cheap, quick and easy to lay, so it is often used in new builds and other property development schemes. Developers aren’t usually that bothered about the cost of replacing something five or 10 years down the line, as they won’t be the one paying for it.
Timber edging has also become increasingly popular with property owners who want to add a decorative touch, but don’t have the time or inclination for something more long-term like block paving.
However, this is not to say that timber edging should be written off completely. It does look better than plastic edging and doesn’t rust, so it’s not surprising that some people like the idea of using it as a landscaping touch themselves.
Wood is more suitable for a garden path as there aren’t any real stresses to cope with. But if you like the look of timber edging, it can be made to last longer if it’s well treated before laying and protected regularly each year.
Constructing Timber Edging
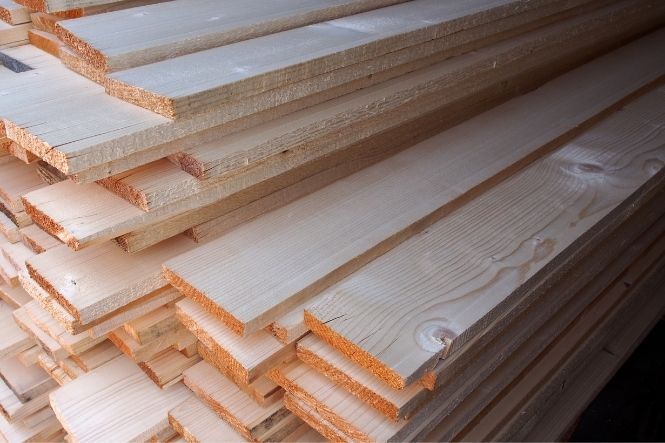
The simplicity of laying timber edging is, as we have already discussed, one of it’s main advantages. In most cases, there is no need to do anything other than drive stakes into the ground to support the boards. These boards are usually between 4-6 inches wide (10-15cm) and three-quarters of a an inch to an inch (2-2.5cm) thick.
The pegs or stakes should be long enough to go about a foot (30cm) into the ground and still leave enough room for two nails supporting the plank. After marking out, the stakes can be driven in and the plank attached. For curves, cut short length of planks and ‘threepenny-bit’ around the curve, leaving shorter distances between each stake. This will allow you to get a tighter curve than if running the plank right up against the stakes.
You will then need to nail through the bottom of each board into each stake. The boards should be end-nailed, not side-nailed, and there should be no more than eight nails per stake (four either side).
Joining Edging Boards
When two planks meet you can butt the boards together and use two stakes or, perhaps stronger and less likely to develop an unsightly gap, use a bracing piece. This is a short piece of board which spans the joint, between the boards and the peg. Make sure the two planks are properly butted together before putting the nails through both layers and onto the stake.
An alternative method is a mitre joint. Cut the ends of both planks to be joined at 45 degrees so that they overlap before fixing them to a peg. This doesn’t leave a vertical joint which may, in time open up and be unsightly. But it does introduce a weak point at the pointed end of the upper board. This won’t undermine the strength of the edging as a whole but the sharp end can snap off easily when a car wheel or a foot goes over the upper plank.
A combination joint, with a mitre that finishes on a vertical cut for the upper half inch (about 1.25cm) of the upper board, may be a good compromise. It does need accurate cutting, though, to avoid a gap and keep the top surface of the edging planks flush. It also relies on the upper board being well supported by nails through both planks and stakes to avoid movement.
Plywood edging makes a good alternative to timber if you want something with a more professional look. It is very popular for lining aquaria or ponds due to it’s resistance to rotting and warping, though it does cost a little more than the timber edging. It comes in different widths and thicknesses, and some of it has tracks for attaching decorative inserts. This is an attractive option if you want to add a bit of colour or interest to your edging.
Finishing Off
Once you have all your boards in place, trim any excess off the tops of the pegs and tidy up. If you have turf or beds on the non-driveway side, you can cut the stakes off an inch or so (2.5cm) below the top of the boards, then push the earth or turf up against the boards, hiding the tops of the pegs. This gives a clean professional look to the whole project. If you don’t have turf or beds on the other side of your edging, then cut the tops off all stakes and fill in with a couple of inches (5cm) of gravel.
Because timber is more porous and rough than concrete, it also collects debris such as leaves and twigs much more quickly. This not only looks bad but can cause the stakes to rot and give an unstable footing. You should keep a regular eye on your edging, clearing off any debris as soon as you see it so that it doesn’t have time to clog up the spaces in timber edging.
Problems with Timber Edging for Driveways
If you are considering a timber edging for your driveway, be aware of the following advice. Always use treated wood if you live in an area with pests that can chew their way through untreated wood or where there is a termite problem. Unless you want to spend money on replacing stakes every year or so, do not mix treated and untreated timbers in the same bed because of the risk of splinters.
An untreated wooden edging can rot if left in damp conditions or will not last long if left out in full sunshine for lengthy periods. Do not leave any stakes uncovered by boards when fitting them. Make sure they are completely covered to avoid fungal infections and insect attack, particularly from wood boring beetles and termites. Use treated stakes as they have already been impregnated with an insecticide which can help to ward off these pests.
To make sure moisture is not trapped against the wood by a covering of moss or algae, keep your edging clean. Wipe it regularly with a cloth soaked in warm soapy water followed by a wipe down with a cloth soaked in warm water. This will keep the wood dry and stop it from rotting.
Conclusion
Timber edging for driveways are a great way to add curb appeal and protection from water seeping into your lawn or garden. Plus, they can help you avoid costly repairs when the roots of trees or shrubs begin to push up against the side of your home. However, there are some things that need consideration before installing them which include: selecting the type of wood based on what is available in your area and how much maintenance it will require; treating untreated timber with an insecticide such as creosote oil (we recommend using treated stakes); keeping debris cleared away so it doesn’t clog spaces between boards; and checking regularly for moss/algae buildup so moisture isn’t trapped against the wood. If this sounds like too much work, you can opt for concrete instead. It requires less maintenance and is particularly good if you have to deal with flooding around your home or driveway because it will not rot away like timber edging might.
