
Retaining walls can be used in a couple of different ways.
The most popular way (obviously) is to better retain dirt, earth, and soil that would have otherwise become unstable and either eroded away or crumpled without any warning or notice.
Some people like the aesthetic of a retaining wall, though – producing “faux retaining walls” that have the same kind of look without the same kind of utility. It’s not uncommon for homeowners to move quite a bit of earth (or have dirt shipped in) to build up these kinds of walls, either.
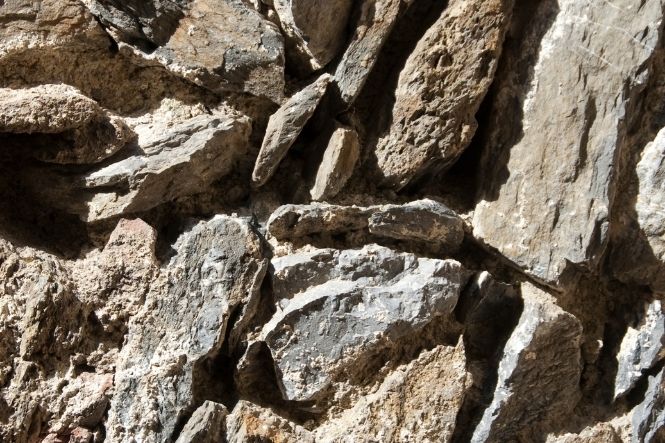
And while retaining walls can be built with all different kinds of stone materials, traditional masonry products, and a whole host of manufactured options there’s nothing quite like the look and feel of a classic river rock or stone configuration.
Let’s run through the benefits of using river rock for this kind of project and how to undertake it.
Table of Contents
Why River Rock for a Retaining Wall?
There are a couple of different reasons to go with river rock for your retaining wall project as opposed to quarried stone or manufactured masonry materials.
For starters, river rock has a much more “colloquial” look that you’re just not going to get with other construction materials. It has a built-in, almost “grown here” kind of aesthetic that matches your natural area and landscape better than anything shipped in ever could.
Secondly, river rock is often a lot more accessible and a lot more affordable.
You may or may not be able to pull river rock right out of a local waterway (you’ll have to check with local rules, laws, and municipal codes before you start to plunder a riverbed) – but if you can you can get all the stone you need 100% free of charge.
Even if you do have to spring for river rock it’s generally a lot less expensive than manufactured materials, too.
Finally, the shape of river rock – super smooth and rounded thanks to its time spent getting tumbled in the river – makes it perfect for a retaining wall project. You don’t have to deal with the odd squared off jagged edges and jagged facets of manufactured materials that look unnatural.
At the end of the day, you’ll love the way that river rock looks but you’ll also love the way that you can work with it, too.
How to Create a Retaining Wall with River Rocks or Stones
The cool thing about building retaining walls is that you don’t have to be a mason or a bricklayer to tackle a project like this and still end up with something really spectacular.
It all starts with a dedication to the fundamentals, laying down a rock solid foundation, and then building step-by-step from there.
Use our detailed guide below to help you hit the ground running!
It All Starts with the Right Rocks
It’s impossible to put together a river rock retaining wall project without having a ton of river rocks on hand!
You’ll want to be sure that you source all different kinds of river rocks, with all different colors and all different shapes in the mix. The idea here is to make this wall look like it was a permanent part of the landscape and not something man-made, manufactured, or something that is going to stick out like a sore thumb.
When estimating the amount of rock you’ll need it’s always a good idea to give yourself a 10% or more “overage” as a buffer zone. The last thing you want to worry about is running out of rock two thirds of the way done!
Trench Out Your New Wall Footprint
After you square away your river rock material you need to begin working on the trench for your new wall footprint.
Go around with a can of high visibility spray paint and spray down the rough perimeter of your new retaining wall. You can make this as wide as you like, but just know that the whiter you go the more material you need (and that’s going to impact the price and the timeline for completing this project).
After marking out your perimeter it’s time to get started with the trench work.
You need to dig down anywhere between 3 and 6 inches across the entirety of your new retaining wall trench. From there you need to be sure that you level out the trench bed and then fill it from top to bottom with pea gravel.
The pea gravel works to not only self level the retaining wall but also helps with drainage issues. It’s a huge piece of the puzzle!
It’s not a bad idea to bury a 4 inch piece of perforated pipe along the “retaining” section of the wall, either. This will help with drainage, fight erosion, and add a lot more structural stability to your river rock retaining wall, too.
Lay a Solid Foundation
The next piece of the puzzle here is to lay down a solid foundation of river rock that everything else will be built on top of.
Choose the flattest stones you can but try and get everything to fit however it wants to, creating as flat and as level a foundational base as possible. After this is done, you want to mix up mortar and pour it over the entirety of the foundation, allowing it to worm its way into every nook and cranny.
Let it set up and cement down for at least 24 hours.
Set Your First Run
Now it’s time to start building on top of that foundation.
Use any combination of river rock you can to build a layer about 6 or 8 inches high (maybe a little higher) and make sure that it is straight, level, and even. Check your work every 3 feet or so to make sure that you are good to go.
Cover with mortar again and allow it to set up.
Lock in Your Second Run
Now it’s time to do the second run.
This run is probably going to be a little bit narrower than the foundation and the first run, but you want to try and keep the width of your wall as consistent as possible.
It’s not uncommon for river rock walls – especially retaining walls – to sort of taper towards the top, but you don’t want it to be an extreme taper (not by any stretch).
Get your second run down, get your mortar in place, and give it another day to cure.
Start the Backfilling Process
After you have two full runs done on your foundation it’s time to begin backfilling the wall.
Enough time will have passed since you built and cured your foundation and your first run that a little bit of backfilling isn’t going to stress things out and cause any blowouts. Just make sure that you aren’t running up higher than your second run.
Instead leave your backfill about halfway up the second run until you have more sections built.
Build Up Runs as Necessary
All you have to do now is alternate building layers, pouring mortar and curing layers, and backfilling as you go along.
The beautiful thing about river rock is that you can pick and choose pieces to meet all of your needs. If one layer has to be a little bit thinner or shorter than the other you can make that happen without having to cut bricks, fight with manufactured masonary products, or hunt for flagstone bits and pieces.
Alternate runs and backfilling until you get the wall to the height you want.
Lay the Top
The only thing left to do here (with the river rock retaining wall, anyway) is to put on the capstones or the top.
You may or may not want these top stones to be river rock as well. You’ll want to add plenty of what mortar to the final run of your wall before you apply your top, though. This will give it a clean, finished, well worn in kind of look.
Finish the Backfill with Plenty of Soil
The last piece of this project is simply finishing your backfill, adding plenty of topsoil to come up to just below the top layer of your wall, and then either planting grass seed or laying down side.
Don’t skip this step, though!
Your new wall is going to be back filled top to bottom with earth that is anything but heavily compacted. Because it’s so loose erosion is going to be a problem, which is why you need that grass seed or side down ASAP.
After that you’re good to go.
