
Whether you’re laying concrete blocks (or flags) or clay bricks (or pavers), the process is largely the same. Any key differences with foundations and the like for the different materials will be covered below. We’ll use the phrase ‘block’ throughout this article to refer to all the different materials that are available.
Get Stocks In
Before you start, make sure you’ve got enough blocks. Allow 5% more than the area you’ll be covering as you’ll have to cut blocks at the edges and won’t be able to use all the spare bits unless you’ve got a degree in geometry. There’ll be accidents, too!
You may cut a block slightly too small or damage when cutting it, particularly if this is your first project, or you may drop a block and break it. Although the blocks are very tough when laid on a proper supporting surface, they are pretty brittle and don’t react well to being dropped or stood on when not supported.
Flexible Paving
For the light use that you will get with a domestic driveway, a flexible laying method should suffice, unless the gradient is very steep or the area is prone to frequent flooding. If you’re in doubt about this, consult an expert (see our article Calculating the Fall On Your Driveway. Flexible paving means that the bedding layer is a soft material, usually sand, rather than a fluid material that sets.
Mark out the driveway edges, either with pegs and string or sand lines and Excavate The Area, allowing for an extra 8-10cm at the edge, which makes it easier to handle the blocks at the edge. The depth should be about 20-25cm, which allows for 10-15cm of sub-base layer, 4cm of bedding and then the block. If the block is deeper than 6cm you may need to dig a little deeper.
The Base Layer
It’s essential that the sub-base layer is good quality, which usually means buying granular aggregate concrete or hardcore. It is possible to lay paving on top of an existing tarmac or concrete drive, but it must be in good condition, and washed down with a power washer. Also you must be aware that the driveway will then be 16-20cm higher than before, so make sure it won’t go over any Damp-Proof Courses, and allow for small ramps where the new drive will meet other surfaces such as the pavement or road.
Many DIY driveways will use hardcore made from a variety of materials, but if you want a driveway to last more than a few years care needs to be taken with this. Avoid too many house bricks in the hardcore and break it all up into pebble-sized chunks so that the sub-base can be properly levelled. If this isn’t done, there will be too many air pockets in the sub-base that will eventually lead to depressions and uneven blocks.
Bedding
Once the sub-base is down, spread the bedding layer of 3-4cm coarse grit sand (also known as concrete sand or sharp sand). Grit can also be used as it may be cheaper than sand in your area, but building sand is a complete no-no as it is too soft and will soak up too much water. Get the bedding layer nice and level.
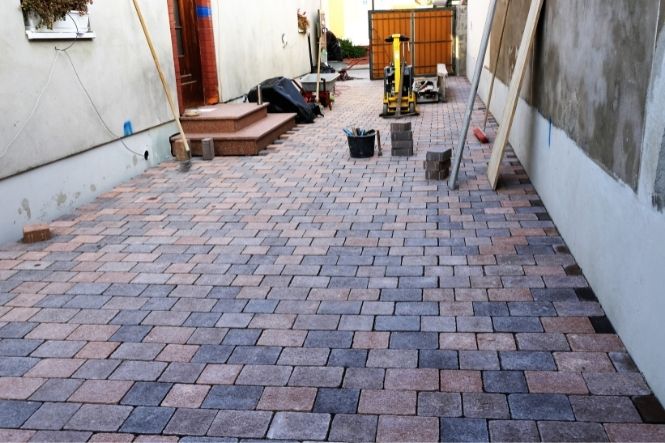
Laying the Kerb and Driveway
Lay the edging or kerb first, referring to our article on the subject in this section. Then lay the blocks, starting from the end furthest from the road. Lay the blocks down from above, don’t put them close to their partner, and slide them in as this will scoop up sand and catch it between the gaps. It’s well worth getting blocks that have spacers built into their sides, otherwise you will have to check each one manually for the correct gap, usually between 2-5mm.
Use the already laid blocks to kneel or stand on as you go to avoid damaging the levelled bedding sand. Make sure you mix up blocks from different packs otherwise you will end up with a band if there is a slight colour difference between batches. Check as you go for level, straightness and alignment, using a straight edge of at least three metres.
Lay the whole blocks first then place the cut blocks between the edging and the whole blocks. It’s well worth hiring a block splitter or a heavy duty power saw with specialist diamond-tipped abrasive blades for this job. Although most blocks can be split with a bolster and lump hammer, it’s faster and more accurate with a saw or splitter.
Jointing Sand and Compacting
Once the paving is finished, fill the joints with jointing sand but not before you’ve given it all one last check for accuracy. This is simply swept over the driveway until the joints are full, and compact if appropriate. Note that clay blocks and some concrete blocks should not be compacted, so refer to the manufacturer’s or supplier’s instructions if you are unsure. If it does need compacting, clean the surface scrupulously before running the machine over the whole lot in criss-cross patterns, four or five times. If the top surface is not clean of sand, grit or anything else, then the compacter will grind that material into the surface of the blocks, leaving marks and possible splitting the corners or edges.