
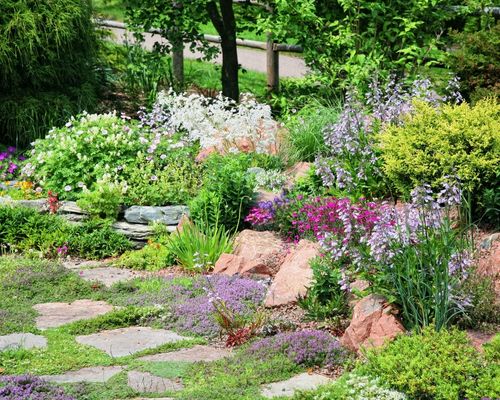
Borders are important for any property as they create a divide as well as privacy. On top of this, a nice looking garden border can really spruce up the appearance of a property.
A rock garden border is wonderful if you’re looking for a natural and rustic effect and they’re relatively simple to build yourself. However, you need to take the right approach if you want the wall to be solid, stable and attractive.
In this guide, I’ll tell you everything you need to know about building a rock garden border and what to expect in terms of its performance.
Table of Contents
Why Choose A Rock Garden Border – The Pros
There are lots of reasons that dry rock garden borders have been popular for centuries. These walls are incredibly versatile and can be built in various ways to fit in with the landscape and at varying heights.
On top of this, a rock garden border is ideal for drainage purposes since any water can flow freely through the joints owing to the lack of mortar. If you build the wall in the just the right spot, this may eliminate the need to install additional drainage features.
Unlike borders and walls that are built using mortar, a dry rock structure has a lot more room for movement. It’ll handle expansion and contraction a lot more easily so there’s less chance of it shifting. This means that the structure, when well maintained, will last much longer.
Finally, if you’re looking for a budget friendly alternative to a mortared wall then rock borders are worth considering. Since you require fewer materials, the cost is often lower. However, you have to keep in mind that your choice of stone could boost the cost depending on what you use.
Are There Any Downsides To A Rock Garden Border?
As with anything, there are some points you will need to consider before settling on a rock garden border. For starters, you need to be sure that the appearance of the wall is right for your garden. These structures have a very traditional and rustic charm but that’s not for everyone. That said, there are ways you can stack the wall and materials you can use to give it a more modern feel.
Plus, where appearance is concerned, you have to be mindful that you’re not going to get a smooth, flawless finish which can be off-putting depending on your taste.
Furthermore, I’d suggest thinking about the time it takes to create your garden border. This method of building can take longer than mortared structures since you need to be very careful about your stone selection and how it is stacked.
If you are going to build anything higher than about three to four feet, you’ll also need to factor in the cost and time it will take for structural reinforcements. You cannot build a stacked wall higher than this without the correct support.
How To Build A Rock Garden Border
If you feel that a rock garden border is for you then it’s important that you take the time needed to build it. Don’t skip any steps as you’ll risk a wall that’s unstable and not solid. The good news is that, if you’re a keen DIYer, you should find this a relatively simple task. Here’s what you’ll need to do.
Choosing The Rocks
The importance of choosing the right rocks for your garden border cannot be understated. In a lot of cases, people will use flat, angular stones as these are typically easier to stack and give a more modern, uniform appearance. However, you may also choose river rock or rounded stones if you want something more rustic. But keep in mind that stacking will be more of a challenge.
You’ll also want to think about cost. In large scale building projects, you may have access to certain types of stone onsite so it’ll be more cost effective to use this. Some common types to consider purchasing are sandstone, granite and slate.
If this is your first attempt at building a dry stone garden border then I’d recommend going for rocks that are a little more uniform in shape. It’ll just make the project easier for you. Plus, it won’t take as long to complete.
Cutting The Rocks To The Desired Shape
If you’ve chosen irregular shaped rocks then you will probably need to cut them to size in order to get everything to fit. Keep in mind that this may even be the case when working with flat stones as you’d be very lucky to be able to stack everything you have without the need for any alterations.
Make sure to protect your eyes using goggles or safety glasses as chips of stone are likely to fly up. Before you start cutting, measure the stone and make clear marks where you’ll need to make the cut.
This is precise and time consuming work as you won’t usually be able to use power tools. Instead, you’ll need a hammer and a rock chisel to carefully score along your markings. Keep doing this until, eventually, the piece of rock falls away.
There may be situations where you need to shape several rocks and in this case, you may be able to use a reciprocating saw. However, it is vital that you use a chisel attachment for this. It’s also possible to buy stone cutting blades for a circular saw but with powered tools like these, you need to be careful not to damage the stone which is why the right equipment is essential.
Digging A Trench
Before you start laying any stones, you’ll need to build a trench and this should be between three and five inches in depth. Moreover, it’s important to ensure that your trench is wide enough for your chosen stones.
When digging your trench, ensure that the base is even. However, keep in mind that most gardens have a slight incline to them so you might have to go a little deeper at some points to keep everything level.
Preventing Weeds
The last thing you want is to build a lovely garden border only to find that it’s infested with weeds a few weeks down the line. Not only can this spoil how the wall looks but they can be a lot more difficult to tackle.
This is why it’s really important to line your trench with a weed sheet. On top of this, I’d suggest laying around an inch of mulch to prevent the stones from putting holes in the fabric.
When choosing your landscape fabric, it’s essential you go for something permeable. If you use plastic then water could pool and this will attract insects. Plus, the importance of good drainage anywhere in the garden can never be understated.
Stacking The Rocks
Now that you have done all of the necessary preparation work, you’ll be able to start stacking your stones. There are lots of ways that you can do this so have a think about the approach you’d like to take before you start placing anything.
You might lay them in a single row or go for a more ornate design if you really want to make a statement. Stacking the rocks higher will allow for a more substantial wall.
It’s also a good idea to think about whether you want a continuous border or something with gaps. The benefit of a continuous border is that it’s ideal for keeping grass out and holding mulch in.
When placing the stones, make sure that you lay them so that they’re all touching one another. This will improve the effectiveness of the structure as well as how stable it is.
How To Stack Rocks Correctly For A Garden Border
For walls that are lower than 18 inches, there’s no need to worry about mortar. That said, you can use mortar if you want something really sturdy and long lasting. However, since this is a guide on building a dry rock border, let’s take a look at some tips to get things spot on.
When you lay the rocks, overlapping them will ensure that they slot together and lock, therefore improving the stability of the wall. A great tip is to build the wall with a slight tilt backwards. You can fill in the area behind the wall using dirt or mulch and this will prevent the wall from toppling over.
As I mentioned earlier, you will need to dig a trench for the rocks and lay them partway into the ground as this will make it less likely that they’ll dislodge.
Ensuring Stability
When you are laying your stones, it’s incredibly important that you make sure they’re completely stable. One trick is to use your hose to spray the area with water. Allow the soil to get wet but not so much that it turns into a mud bath.
You can then take a mallet to tap the stones into the ground so that they feel solid. Do be careful not to hit them too hard as this could damage them or affect the ground below, reducing stability which is the opposite of what we’re trying to achieve.
Once the wall is finished, take the time to look over and check for any loose rocks. If you do find any that you may need to rewet the ground level and hammer them in a little more.
Conclusion
Creating a garden border can improve the appearance of your outdoor space and separate areas. Whether you want to build a single layer border between the grass and a flower bed or create a small wall to divide sections of the garden, building with dry rocks is easy and affordable.
Since you won’t be using mortar, it is important to make stability a priority. But you’ll also need to think about things like weed prevention if you want the most long lasting and beautiful rock garden border.