
Laying your own patio stones doesn’t need to be difficult. We’ll show you how to do it in 6 steps.
Laying patio stone is typically a 6 step process. First, the area needs to be excavated. Next, the area is laid on a compacted base of crushed stone and granular dust. A cement compound is used and each stone is carefully laid onto the compound and levelled. Finally, patio stones are cut to finish the layout, the joints are filled with stone dust and cleaned with fresh water.
Adding stone to your patio area is a great way to spruce up the garden and add some usable space for a table setting or other garden furniture. If you’re looking to improve your backyard and considering laying patio stones yourself, read on to discover some handy tips in our step-by-step guide.
Table of Contents
Equipment required to lay patio stone
To give the best chance of a professional job, it’s important to have the right tools on hand. Here’s what you’ll need:
- Shovel and Spade
- Garden rake (at least 24 inches wide is best)
- Broom
- Wheelbarrow
- A 4-6 foot spirit level
- Laser level or builders level
- Tape measurer
- Builder’s pencil (or chalk for dark coloured stones)
- Small sledgehammer
- Large rubber mallet
- Circular saw with Diamond blade for cutting stone (or a wet-table saw)
- Plate compactor (
- Hand tamper
- Hand trowel
- Pointing trowel
- Water, bucket, and hose
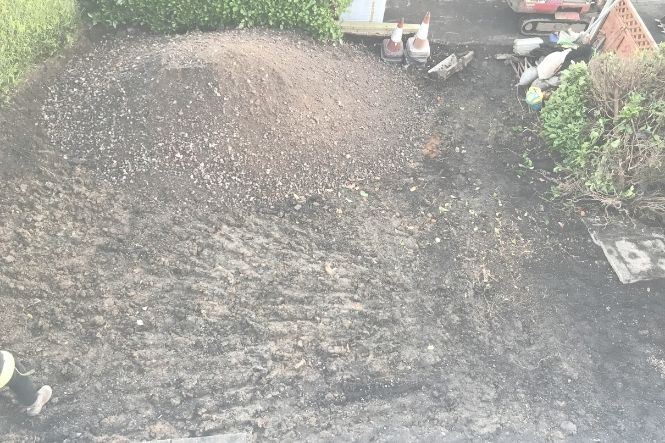
- Crushed stone
- Stone dust
- Dry cement
Step 1. How do you prepare the ground for a patio stone?
No matter what soil conditions you have in your yard, you’ll need to excavate the area where you are intending to lay the patio stones.
First, mark out the area either using marking spray paint or a string line and pegs. Take note of any potential obstructions and be careful when digging around pipes and foundations. The type of soil and freezing point in winter will affect the amount required for excavation as noted below.
If you live in an area prone to frost and freezing temperatures, excavate at least 12 inches of soil to allow for adequate drainage and base. If you live in an area with dry soil or sand, then 6 inches will be adequate for excavation.
When excavating, try to keep the ground as level as possible without any large holes or gullies which will require additional base to fill. You can use a laser level or builders level to check your excavation level and depth. Once the area is level, use the plate compactor to flatten out the area and prepare for the base.
Step 2: Set the base
This step will differ in the depth of material depending on how much you have excavated. First, you’ll need to spread out the subgrade with a 3-inch layer of pack which is a blend of ¾-inch crushed stone and stone dust.
Step 3: Compact and repeat
Use the plate compactor and a little water to damp each layer before adding the next. Use the hand tamper to tamp the edges near a house or around drainage pipes.
Repeat the process again, laying another 3-inches of blended pack and compacting and levelling the base each time. This step should be repeated until you are at the desired height. To check this, first, measure the stone thickness and allow another 1.5 inches for the setting bed.
For example: if your stones are 1 inch thick + 1.5 inches for setting bed = 2.5 inches. Allow your blended pack to be around 2.5 inches below the finished height.
Step 4: Locate first stone location and spread setting bed, laying stones
In this step, you’ll want to allocate where your starting stone will be laid. This is often along a straight wall where consecutive stones can be laid alongside with minimum fuss and without having to step over the stones.
Tip: If you’re working in an area with one entry/exit point, work from the farthest area and back to the entry/exit point.
Next, you’ll be making the setting bed which is a combination of 1 part dry cement and 12 parts stone dust. Use a wheelbarrow to make a mix and blend well. Once both materials are well blended add a little water and continue to mix until you get a stiff mix.
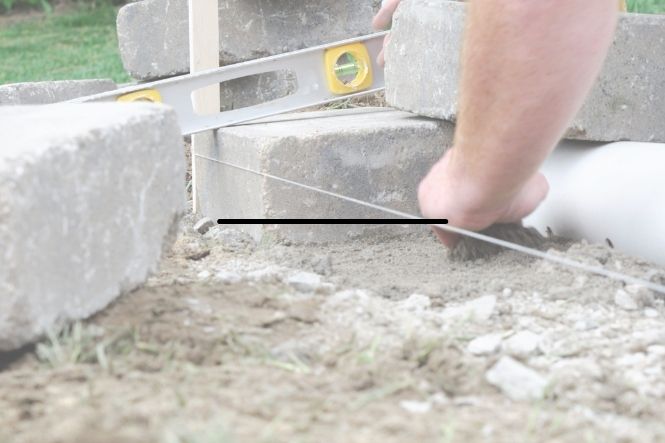
Shovel out the mix with a shovel and use a stiff rake or trowel to spread the mix for 1 stone at a time. Use the rubber mallet to position and level your stones. Use a spirit level to check the levels as you go.
Step 5: Leveling and finishing stones
Level your stones as you go and work down a row until one line of stones is complete. Use the trowel to remove any excess setting bed around the edges before moving on to laying the next stone. Use the pointing trowel to remove any of the setting bed that protrudes through any of the gaps, you’ll fill the joints later in the final step.
Don’t worry about cutting any stones at the beginning. It’s easier to lay all full stones first and then once the bulk of the stones are laid, go back and cut and finish any stones for the outer edges that need it. Cutting takes time and precise measurements so only mix small amounts of setting bed at a time.
Tip: Remember, take your time. Good work takes time and bad work takes even longer as you’ll have to redo it.
Step 6: Cleaning and jointing
Once all your stones are laid, allow at least 4-6 hours minimum (overnight is ideal) before walking on the patio stones. Use a hose and broom to clean the stones thoroughly and allow them to dry.
Use a bucket to spread some stone dust in piles over the stones and use a broom to sweep it into the joints. Lightly hose down the stones again and use a pointing trowel to pack the stone dust into the joints. Repeat this step until the joints are firm and level with the surface of the stone.
Tip: Don’t use cement to fill the joints as it will pop or dislodge tiles in freezing weather. Sand should not be used either as insects often burrow into sand.
There you have it, you can now lay your own patio stones. Enjoy your new space and be proud of your hard work. Make sure you show it off to friends and family!
