
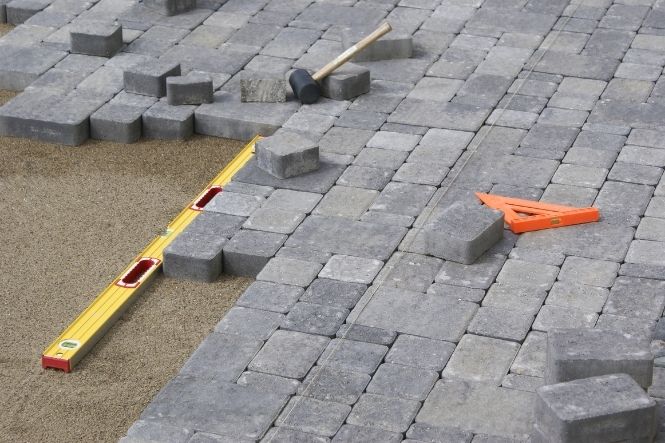
Getting the levels right on a patio is a time-consuming and pain-staking job, but putting effort into it will give you a patio that looks good and drains well. The alternative is a patio where the flags don’t line up correctly, there are height differences at the gaps that get bigger over time, and water forms puddles when it rains.
As with many other aspects of driveway laying, getting this right is more about the preparation of the supporting surfaces than the actual Laying Of The Stones, flags or other surfaces. No specialist equipment is needed and, although it is now possible to buy cheap laser levels, that’s overkill for just one patio.
Table of Contents
What Does Level Really Mean?
There are three different elements to getting the patio levels right. The first is to make sure the area is flat; that is to say that there are no raised edges between stones to trip people up. The second is to make sure it is level, as in all the flags are lined up with each other in the horizontal plane.
And the third, although it seems contradictory, is to make sure the patio surface is not level. For Drainage Reasons you need to have a gradient, known in the trade as a ‘fall’, from one end of the patio to another. Usually, this slope will go away from the house, so that water isn’t encouraged to pool next to it and cause damp problems. But in order to be able to make a fall that is not level, you need to know where the level is.
Starting the Level from the House
Assuming the patio site has already been excavated and the edges marked out with pegs, pick a level on the wall of the house that is below your Damp-Proof Course, but not so low as to make too big a step coming out of the house. If your ground is on a steep slope, particularly if it slopes toward the house, then you will have to get creative at this point and perhaps decking would be a better choice than a patio (see When, Where And How To Fit Decking on this site). .
Using reasonably straight edges, such as new timber battens, and the longest spirit level you can lay your hands on, mark that line on the brickwork of the house all the way along with chalk or another semi-permanent marker.
Calculating the Patio Fall
It’s now time to calculate the fall, which will encourage water away from the house, using the industry-standard ratio of 1:80. This means that for every 80 units of distance along with the patio, the level must drop by one unit. So if your patio is a rectangle 6 metres wide and runs 4 metres from the house, it will have to drop by 4m divided by 80, which is 5cm.
Now we know the patio has to drop by 5cm between the house and the end of the patio but in a straight line. In order to measure this, we need to transfer the level from the house to the 4m mark. This can be done by getting the longest straight edge piece of timber you have and attaching your spirit level to it. Set the end near the house on a pile of sand and a brick then do the same for the far end, tamping down the brick on the sand until the timber is level.
Taking the Level Out
The nearest peg can then be marked with a level and the 5cm drop. Continue this procedure along the wall of the house and then join the marks on the pegs with timber boards or lightweight string, perhaps edging boards tamped down into the soil, whichever method you prefer that suits the materials you will be laying. Use those markers as guides when you are laying the top surface of the patio, with straight edges to make sure the slabs line up in all the relevant directions.
This is a simple method that should deliver the goods for the average patio and doesn’t need any specialist equipment. With care, it should be good enough to ensure a smooth surface without puddles that won’t trip the unwary.
Using a Laser Level
For people who have the cash to splash on top-quality equipment, a laser level is the ultimate for getting patio levels right. There are stand-alone models that will do an accurate job of levelling and can be bought quite cheaply, or there are versions you can attach to your smartphone or tablet computer that use GPS to get the job done. The more expensive laser levels will give a read-out on how far out of level your surface is, and even automatically carry out all the calculations for you if you want them to. Either way, it’s worth doing some research before you buy any ‘leveling equipment’, as what’s right for one project might not be right for another.
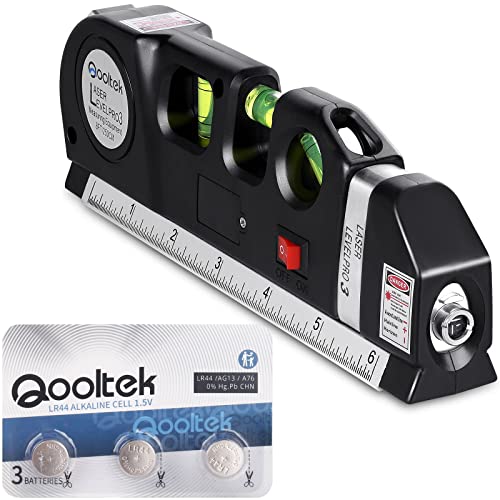
- 📏3-PRONGED APPROACH - combines a fine-tuned tape measure, a triple-positioned leveling bubble and...
- 📏WORKS FOR INDOOR - designed for any situation where a straight line or accurate measurements are...
- 📏8-FOOT Measuring Tape - comes loaded with an 8-foot measure that includes imperial and metric...
For example, not all laser levels are designed to make adjustments for the slope of a site, and some people have reported problems with the equipment they bought. Also bear in mind that if you’re planning on digging large holes or building stone walls etc., then working out your surface-level using a laser level can be even more time-consuming than the old string and peg approach.
However, if you’re planning a fairly basic patio project enlivened with just one or two stepping stones or occasional steps to get over a slightly raised edge, then by all means go for the laser level option – it will give you more accuracy and speed up your work considerably.
Tiling Around an Old Patio: Tips for a Smooth Tile-Laying Job
If you have an existing patio that you’re planning to remodel, then it’s well worth considering whether your tiling will be better or cheaper if you move the whole surface of the patio rather than just laying tiles on top.
Using boards to support the tiles will be better than trying to dig in all the old patio slabs, as you can more easily make adjustments if necessary. If you have chosen a modular board (one section fitting into another) then it won’t be impossible to move things around at a later date should you want to alter your floor plan. Putting down boards also has the advantage of making it easier to line them up parallel with the house or a wall behind.
To move your patio slabs, lay a few pieces of plywood under each slab (it’s worth marking them first so you can see where they’re supposed to go) and then push the top layer over them, taking care not to spill any concrete toppings (any leftovers will be useful for filling any subsequent irregularities in the surface).
As soon as you are happy that you have all the patio slabs in a good place, it’s time to put down some gravel. For this bit of your work, I recommend using #10 crushed stone rather than more expensive natural products.
Conclusion
Follow these easy instructions to have the perfect patio for your home. You might not need a laser level if you’re just planning on laying some stepping stones or occasional steps, but it’s worth considering whether tiling around an old patio is better than trying to dig in all those slabs. The cost of new materials and time spent may be well worth it when you consider how much more difficult that would make things later down the road. If you want help with levelling out your surface, use boards rather than digging up all those old tiles – this will also save money in case you need to change anything at a later date!