
Most people pick a concrete drive because it’s relative quick to lay, and once it’s down you can forget about it. But it’s important to make sure that there is proper edging along the drive or it can deteriorate quite quickly.
The stresses on a driveway are quite severe. As a ton-and-a-half of vehicle goes over the drive the load spreads to the sides, where an unedged concrete slab can start to break down. The ends of the slabs are also under tremendous stresses and can, in extreme cases, break up and drop a lump of concrete on top of the tyre.
As well as preventing movement it’s important to seal any cracks along the edges. This is because moisture will get behind the slab, and when it freezes during cold weather this moisture will expand and cause more cracks.
Table of Contents
Simple Edging
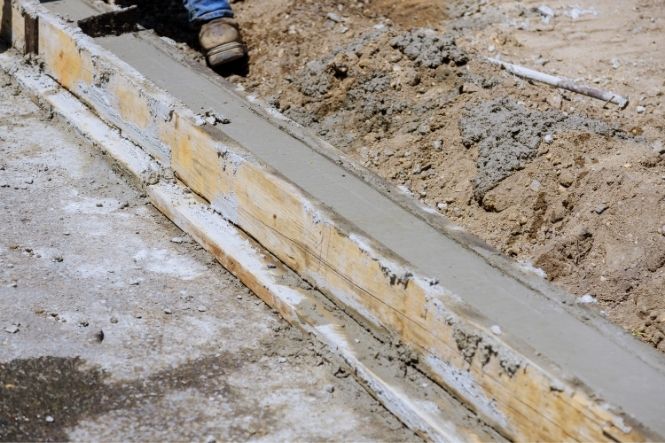
It is possible to use wooden formwork to provide a backing to push concrete up against, then remove it once the driveway has begun to set. This may well be sufficient to keep the integrity of the edge, particularly if the driveway can be a little wider than it needs to be. Otherwise an edging of block, concrete kerb or paver should be embedded in concrete to hold the driveway in place and prevent the edges crumbling.
This is particularly true if vehicles will occasionally go over the edge of the drive, perhaps if it’s quite long with a curve, slope or bend. As cars go over that edge they will knock small pieces off, speeding up the deterioration.
Plan Edging from the Start
It’s important to think about edging at an early stage. If you add edging at the end of the project, it won’t do the job properly. The blocks, pavers or kerbs should be mounted on a bed of concrete in position and allowed to set before the concrete for the driveway itself is poured (read our article Laying Concrete on Your Drive or Patio on this site.)
Once the excavation is out of the way, and the driveway layout has been marked out, prepare a fairly stiff mix of concrete. If it is too liquid it will spread out. Build ridges of concrete along the edge of the drive and push the edging blocks into the top of the ridge, pressing or tapping each block down to the correct level before moving on to the next one. Build the concrete up on the inner face of the edging block to hold it in position.
Haunching Supports the Edging
Once that’s all done you need to put a barrier of concrete behind the edging blocks. This is known as ‘haunching’ and counters the sideways spreading force mentioned earlier. The haunching should be as wide as the block that it is supporting and to within an inch or so of the top. Taper the top of the haunching downward to aid drainage away from the driveway.
If this all sounds a little too tricky, you can use pegs and boards to Lay Out Wooden Formwork either side of the edging run. Then you can lay the bedding layer in between the formwork, tamp it down, press in the edging block or kerb, then build up the haunching using the formwork as a guide.
Protecting Edging
Pay strict attention to levels as you are placing the blocks. In particular, you should make sure the blocks are flush with the level of the driveway itself if that’s the look you are after. You can then use them as formwork and level guide while pouring the drive.
If this is not the case, and you want the edging to be proud of the drive concrete level, protect the face of the edging blocks with a thin piece of ply or stiff plastic. Then when you have laid and tamped down the drive concrete, slip the protective layer out carefully. The concrete will spread to close the slim gap left behind and set, preventing concrete stains on parts of the edging blocks that are above the driveway concrete level.
Make sure you take the protective material out before the concrete sets too hard, though. You should now have a smooth driveway with professional edging that will last for a long time.
A good time to think about edging is when you are thinking of sealing your driveway. The sealant will last longer if it can’t get under the edge, and if there’s a wide enough gap for water to drain away from underneath. If you wait till the end to do this, however, it won’t be possible to put down a reasonable layer of sealer.
Also, sealing the driveway before edging will make it difficult to avoid getting some sealant on the face of the edging blocks or kerbstones, which will look unsightly. It is worth hiring a machine to smooth and groove your concrete drive before pouring it.
Conclusion
Edging should be considered at an early stage in the laying of concrete drives and patios. It will not only make your drive or patio look good, it will also protect it from damage. Add the haunching early to ensure that you level is right for the edging blocks, but leave just enough time for this concrete to set before laying the main drive surface.
And finally…
If you are building a concrete driveway or patio, it is well worth considering adding an edging layer to protect your work and make it look good. If you want any new concrete driveway to look professionally finished, we recommend that you use kerbs as opposed to blocks or other types of edging.